Quick Start
Set up CelerSearch end-to-end in a few minutes.
Prerequisites
- CelerSearch plugin installed and activated
- A Meilisearch instance you can reach from WordPress (managed CelerSearch Cloud or self-hosted)
Step 1 — Connect a Service
After activation, a WordPress admin notice invites you to pick a hosting option (managed CelerSearch Cloud or your own Meilisearch). You can also open CelerSearch → Services directly — the empty state has the same chooser.
- Go to CelerSearch → Services and click Add New
- Enter Name, URL, and API Key
- Click Test Connection — CelerSearch validates the credentials before saving
- Save
Use an admin key
CelerSearch needs an admin key to manage indices. The key is never exposed in the browser — frontend search, autocomplete, and shop-filter requests are proxied through WordPress REST endpoints, so it stays server-side.
Step 2 — Create an Index
- CelerSearch → Indices → Add Index
- Step through the 3-step wizard:
- Select Type — Posts (covers posts, pages, and custom post types), WooCommerce Products, WooCommerce Orders, or any custom type a plugin registers
- Configure — the type's fields (e.g. which post types to include)
- Select Service — the service from step 1
- Save — a slug is auto-generated (with
-1,-2… suffixes when deduping is needed)
WooCommerce
The WooCommerce Products and WooCommerce Orders index types only appear when WooCommerce is active.
Step 3 — Build the Index
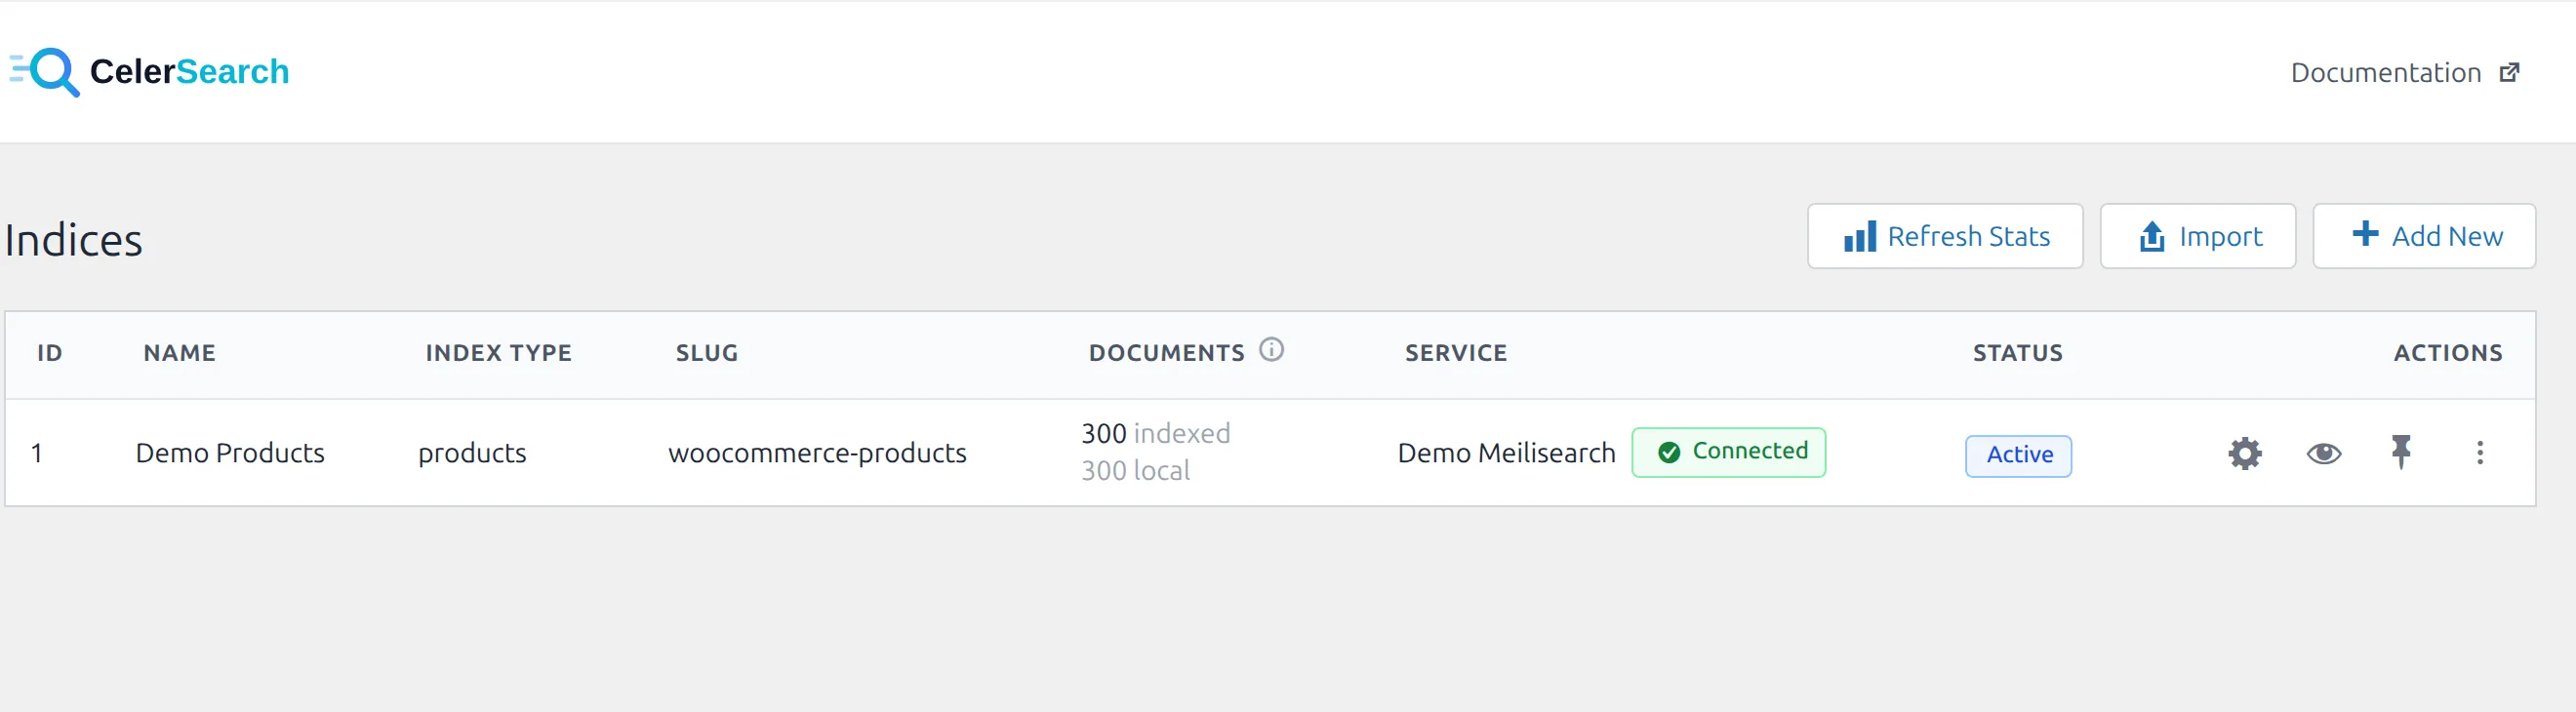
Hit Rebuild on the index row. The rebuild modal paginates through batches, deleting the remote index first, pushing settings, then indexing in chunks. Progress is driven by your browser — keep the admin page open until the rebuild completes.
Batch size is configurable in Settings → General (default 100, range 10–500). For very large sites you can also rebuild from the command line with wp celersearch reindex — see Creating Indices.
Step 4 — Tune Index Settings (Optional)
Click an index's name to open Index Settings:
- Searchable attributes (order = priority)
- Filterable attributes (what can be facetted or filtered)
- Sortable attributes
- Synonyms
- Typo tolerance (min word size, disabled words/fields)
- Stop words
- Content splitting (per-index toggle to split long content into multiple records)
Changes push to the search engine on save. No rebuild is required for most setting changes; adding or removing attributes that need to be re-analysed will be flagged.
Use Browse on the row to open the Index Browser modal — it lets you search, filter, and inspect actual indexed documents for a sanity check.
Step 5 — Wire It Into WordPress
- CelerSearch → Settings → toggle Enable CelerSearch
- Pick a Default Index (the fallback when no search area matches)
- Under Search Areas, click Add Search Area:
- Type = WordPress Public Search
- Index = the one you just built
- Toggle Autocomplete to offer instant suggestions
- Save
See Search Areas for the full area type list and per-area features.
Step 6 — Try It
Search on your frontend. You should see:
- Sub-50ms responses
- Typo tolerance ("laptop" matches "labtop")
- Highlighted terms in the results list
- Optional autocomplete dropdown under the search input
What Happens Under the Hood
On search:pre_get_posts intercepts → context detected → area matched → index resolved → Meilisearch queried (with taxonomy filters extracted from WP_Query) → WordPress posts_search SQL neutralised → results injected into the loop with highlighting hooks on the_title / get_the_excerpt.
On content change:
Observer fires on wp_after_insert_post / meta changes / deletes → queued via Action Scheduler (debounced so rapid saves collapse into one sync) → item synced to the index in the background.
Next Steps
- Real-time sync — what triggers updates and how to steer it
- Creating indices — available types, configuration, and programmatic creation
- Template overrides — restyle results from your theme
- Hooks reference — the full extensibility surface